Creating new Sitecore headless components
- Sridharan Padmanabhan
- Dec 12, 2024
- 1 min read
Updated: Dec 13, 2024
Prerequisites:
A fully set up headless JSS application with connectivity to Sitecore. Refer Creating the first Sitecore headless app for getting that done.
Once the headless app and connection to Sitecore are set up and ready, open the root of the headless solution on VS Code.
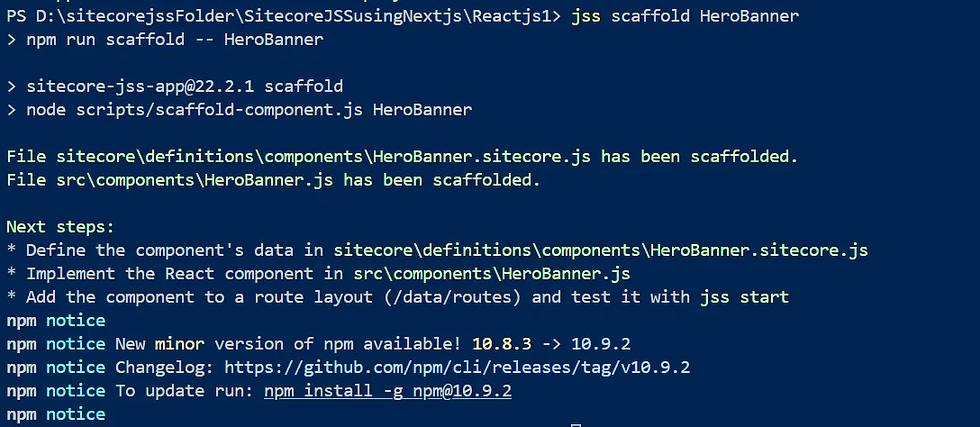
Run the following command on a terminal to insert a new component — jss scaffold <ComponentName>
jss scaffold HeroBannerThis will scaffold all the necessary elements needed for the component.

This scaffolding process would have created two main files,
The component code file itself at src/components/HeroBanner.js. This would need to contain all the presentation logic for the component.

A manifest file for the component at /sitecore/definitions/components/HeroBanner.sitecore.js. This file would need to contain all the data fields that this component would need, this eventually would be responsible for deploying a data source template for the component in Sitecore.

You can add additional fields to your manifest, I have added a description field for example. I, then used this description field in my component to display alongside my default heading.
Like so -
Manifest

Component

Then we move forward, and deploy our app to Sitecore using
jss deploy app --includeContent --includeDictionary --acceptCertificate <Your cert thumbprint>Upon successful completion, this deployment would create the following items in Sitecore -
A component definition item, presets on data source related fields.

The data source template with the fields specified in the manifest file, and the rendering parameters template.

Now, you can go ahead, add the component to the layout of a page and see it in action.


Comments